I picked up some 1/2″ rope this week to make a boarding ladder for the sailboat. It seemed simpler and much cheaper than buying a transom ladder, or pre-made rope ladder.
Ben immediately decided that we should build the rope ladder from “The Magic Tree House” series of books. He even brought down a copy of one of the books so we could look at how it was made.
This morning we went out to the workshop and picked out some wood (I think it is cedar) that was the proper size and didn’t need milling. It was a quick project with both boys helping. The rough lumber isn’t slippery, so it makes the ladder safer.
Total time: 5 minutes picking out lumber; 10 minutes cutting the lumber by hand; 10 minutes to drill the holes on the drill press; 10 minutes to make into a ladder with both boys helping.
We finished in time to head to the submarine base and spend an hour and a half swimming at North Lake before lunch. Now to build the boat ladder….
I’m at a good stopping point in the workshop renovation, so I figured I’d start using the workshop. Tie to jump into the kitchen island project.
This morning I milled the legs from white oak. I spent some time thinking about how I would make the mortises and tenons for the project (8 total each to attach the apron to the legs). The last project I had routed the mortises on the router table, and made the tenons using the table saw. I thought about it, but didn’t really want to go that route.
I didn’t really want to do all the mortises by hand either. So I’m using the drill press to clear out most of the wood from the mortise, and then cleaning it up by hand. I made a mistake with the first one. I should make the tenons first – then the mortise. I made the mortise, and had to make the tenon to match. I cut the tenon by hand. It didn’t fit right off the saw – but it didn’t take too much to make it fit – so I’m pleased with how it turned out. I also decided to make them haunched tenons. I also plan on pegging the tenons – hopefully they are long enough to make it look decent. I guess if I need longer tenons, it won’t be terrible to do by hand – I’ve only cut one mortise and tenon that I’ll need to adjust.
One of the advantages of doing things by hand – I’ll work on one joint at a time. No need to set up the power equipment and batch the joints. I can also listen to music while I do the handwork. It is much more pleasant than using the big power tools. Don’t worry, I’ll still use my power tools. I have no desire to rip a 5 foot long piece of white oak by hand. Nor do I want to take the 5/4 white oak and mill it down to 3/4″ without using the power planer.
I am feeling good enough with the workshop renovation to start the next project (using the workshop). I am not quite done on the workshop – I still need to fix the trim around the new window and add trim around the other windows on that wall. I also need to finish cleaning out the cut out area for the stairs (and finish the railing on the top). However, I’ll treat those as separate projects and fit them in later this spring.
Kitchen Island by Asa Christiana - inspiration for my next project
The next project will be an island for the kitchen. I was inspired by the island built by Asa Christiana (of Fine Woodworking). I plan to change the plans – his project is a little too large to fit into our kitchen. I will make the island a little narrower and probably a little shorter (he didn’t give dimensions). The base will be made from white oak, not butternut and the top from ash vice soapstone.
I’ll have to alter the design for more than the size. Our kitchen feels narrow, so a longer, think island would be better. I’ll put an overhang on one end (short side) and not the long side, but I will try to do the carving details that he added, and may modify some of the details on the legs. It will be my first attempt at carving – it will be a good challenge (and I do have the Fine Woodworking article to help me).
Will helped me pick out oak for the legs yesterday. I’ll try and get the legs milled this weekend.
It felt good to get back into the workshop after over a week out of town for work. I took a little break from my workshop renovation to build a saw bench with Ben. He helped me mill the top from a piece of lumber (maybe wormy chestnut – I’m not 100% sure, could be wormy pine) before I left.
Last night he helped me get the legs cut from a piece of cypress I had below the barn. He helped me mark out and cut the dadoes for the legs, but then got a little bored with the project.
I did most of the remaining work. The stretchers are red oak (I had it laying around), and I didn’t make a bottom shelf. I milled the lumber using the power jointer and planer. However, I did nearly all the joinery by hand. I can tell I need practice with the hand tools.
Ben helped me assemble the bench (glue and wood screws). Tomorrow I’ll take the old workbench I made for the boys and put it on the second floor, leaving only the saw bench. I have a thick piece of ash set aside to make the top of Will’s saw bench (when we get around to it).
One more project completed this year. Now to the sharpening station (also spoken, “Kitchen table”) and sharpen some of my very dull tools.
Completed saw bench (I didn't have Ben cut a notch for ripping - I'm pretty sure it will be a while before he rips any lumber by hand).
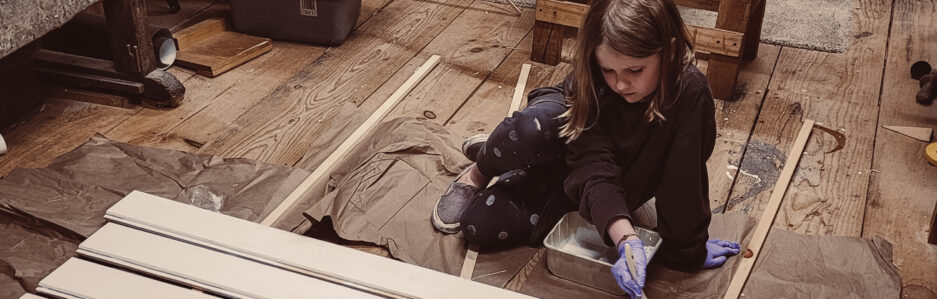
Last month I completed a set of pretty simple cutting boards with Will, Ben and Ben’s friend, Anthony. Making long grain cutting boards is simple, and was easy for the boys to complete.
I did all the milling before the boys arrived. I found a bunch of scrap lumber in the workshop and cut them to about 15″ in length. I then milled them all to the same thickness. The exact thickness doesn’t matter – I just made them all match the thinnest piece of scrap.
I marked then cut them into varying strips of 1/2″, 1″, and 2″ width. I marked arrows on each piece so the grain all lined up (so I could use the jointer/planet in the final boards to clean them up).
I then had the boys mix and match the strips into boards that were no wider than 7″ (so they would fit on the jointer). In hindsight I could have let them make the boards a little wider. The boys then glued up the strips into boards and let them sit overnight.
After the boards were dry, the boys helped scrape away the glue squeeze-out and I ran them over the jointer and through the planer to even them out. The boys can help at the planer, but have to stay away from the jointer.
I then cut the boards to size on the table saw, and the boys used the router table (with a lot of supervision) to round over the edges. They then hand sanded the boards and applied a coat of mineral oil/beeswax coating.
It was a quick project that required little prep and no cost by me (the scraps would have gone into the fire put if not used). The steps were short and simple enough for the boys to not get bored. And the boys had a chance to appreciate the beauty of different species of wood.
I have been making good progress on the workshop. The biggest part of the renovation is a new set of stairs to the second floor. The current stairs are in the front corner and are too steep, too little headroom, and no landing at the top. Originally there was no handrail, but I put one in last year. One of the other problems is there is no way to close off the second floor so I can heat the first floor.
After much thought and planning (if I haven’t mentioned it, I like to discuss projects endlessly before I actually decide what I’m going to do), I decided to put a new staircase in the back corner. To make the stairs a normal angle, I needed to have the stairs turn a corner. Over the past couple of weeks I have built the wall that will hide the stairs, and have started constructing the stairs themselves.
Saw Till and Hand Plane Storage
I am using the new wall as my hand tool storage (and display) area. It is a work in progress – I have to use the workshop as I am building in it, so I have been adding storage as I go. I had been storing my planes on a shelf, but that is a pretty inefficient way to store them. So for this new wall, I built a storage rack for them. the planes are held in place with a clip and magnet. I used laminated pine shelving that I had laying around (it had in a previous life been part of a stereo cabinet). I also built a saw till. Okay, I built two saw tills. The first one didn’t work so well. I took a 10″ wide piece of lumber I had laying around and cut slots in it to store the saws. Unfortunately, I wasn’t thinking and the slots were across the grain. So the fingers between the saws were pretty weak. On try two, I used one of the laminated pine boards and cut the slots going with the grain. This version is much stronger. It holds three back saws and four hand saws. Now I have to get around to sharpening more of the saws.
Cutting the hole for the stairs from above
Over the past couple of weeks I constructed the landing where the stairs will go around the corner. It is framed 2x6s supported by 2x4s. It is mostly level (as well as I could do with the current unlevelness of the barn). The stairs going from the landing up to the second floor will be 46″ wide (it was a good width based on the overhead joists), but the three stairs from the landing down will only be 36″ wide (I had to fit the stairs to end at the support beam, so couldn’t widen the bottom).
After completing the landing, I built the stringers and stairs down to the first floor. It was pretty simple, only 3 stairs down. The top stringers were a little more work, 9 stairs up.
Tonight (with some assistance from Will and Ben) I started cutting the hole in the floor for the stairway. Of course, once I opened up the floor it meant no more kids on the second floor until the stairs are finished – if anyone falls through the hole, hopefully it is one of the cats, and if not a cat, then a dog, and if not a dog then me.
This week I’ll finish cutting the two joists out, and install the stairs. The treads are made from two 2x6s cut to length (and ripped to width). I haven’t decided where to put the light switch for the second floor – either leave it where it is or put it over by the bottom of the stairs. I’ll also need to add a light on the stairs – they are much darker now that they are enclosed.
After the new stairs are built, I’ll tear down the old stairs and cover up the hole from them. Under the stairs will be storage, and a sink (and maybe a urinal – I have a beer/soda machine, power tools, so all I need is a urinal to make it complete). I picked up a 60 gallon water tank on Craigslist that I will use as a water supply. I’ll put the tank on the second floor and let it gravity feed (it would already be on the second floor, but it couldn’t fit up the current stairs).
I also make a good score at a garage sale this weekend. I picked up a new set of chisels (though I may turn them over to Mark at cost – otherwise they are my loaner chisels), a Stanley 4 1/2 smoothing plane in good shape and a Stanley #120 block plane (okay, not the nicest block plane, but it is in pretty good shape compared to my other block planes).
Cutting boards made by the Curtis boys (all three of us).
It has been a while since I’ve written. I would love to pretend it was because I have a crazy exciting life, and I’ve been too busy living it. But sadly, that isn’t the case. I have been busy, but not that exciting.
I spent this month making cutting board after cutting board. My cousin got married two weekends ago, so as a wedding gift, I made him a set of drunken cutting boards, inspired by projects on lumberjocks. They turned out pretty nice (for my first try). Unfortunately I forgot to take pictures of them (I didn’t want to post before the wedding, in the odd chance that he actually reads this blog).
I decided that cutting boards would be a good way to use up the wood cut-offs I have laying around the shop, and a good project to do with the boys. I took all the interesting short pieces of lumber laying around, cut the boards to 18″ long, milled them to the same thickness, and cut them into strips of varying width (1/2″, 1″ and 2″). I then let the boys pick out the strips they wanted to use and they glued up the boards. I made sure that the boards were narrower than 8″ when glued up so we could flatten them quickly on the jointer.
I had enough strips for Will, Ben and Ben’s friend, Anthony, to make boards. I also made two myself (with the remaining wood). One is a little bigger (pictured above), and the second I gave to a friend at work.
I’ll have to write more later about the wedding trip to Bowling Green, KY, visit to Mammoth cave with dad and Barbara, and a stop over in Louisville to see a friend I hadn’t seen in 20 years. I would love to share all the pictures I took on my trip, but the camera stayed on the counter where I forgot it.
It is nice to be home and back working on the workshop. It is making progress. I’ll take more pictures tomorrow night (maybe).
I finished the final two shelves for the bookcase last night. I love the spray finish and spray system. A step that would have taken nearly a week with an oil-based finish can be finished in a couple of hours. When I used a wiping varnish, I had to let the project dry overnight between coats. With the spray finish it takes 15-30 minutes to dry between coats. That means more coats in a single night, and fewer dust particles on the project. The water-based finish also leaves much less of a smell in the house (and no smell on the project after it dries to the touch in 30 minutes).
It will be a nice addition to have book storage in the study. I’m okay with how the bookcase turned out. I can see some of the mistakes I made – I probably should fit the shelves after the carcase is constructed and need a proper shelf-hole jig. But overall it feels pretty sturdy and looks not too bad. Last night I bet Will a quarter he couldn’t find two mistakes in 5 minutes on the project. Of course the first mistake he found was one that I hadn’t noticed before – it is good to find another honest critic in the house. No sense in building projects for the house if I don’t try to make myself a better woodworker from each project.
I also have been making some progress on rearranging the workshop. My first attempt to reorganize failed (having the planer between the jointer and table saw made for a much too long walk around the jointer to feed wood into the planer).
Today we are planning a chore day. I will get some concrete to pour a footing for an additional support post for the workshop, and then work on making a small patio/step in front of the door to the workshop – I have been using the workshop enough that all the grass is dead – it is now a mud pit. I am using some lumber I have left over and the remaining concrete blocks from the patio. So it is a double bonus. I use up some materials I have sitting around and get a new entrance step to the workshop.
Of course I am expecting to get all these projects done and still have time to hand out, maybe paint the new door to the workshop, maybe work on shelves for the workshop. However, I am learning (yes, it does take a long time to learn) and am only planning the two outside projects for today. Anything else will be a bonus.
Workshop wall after reorganizing. I removed a workbench that was only used to store junk - now to build proper storage for that junk)
The cherry bookshelves after a coat of shellac (I did take a shortcut and not finish the bottom)
What a night… there is nothing like listening to a strong wind in an old house. I never cease to be amazed by how much noise the house makes in the wind. The barn is even worse. I don’t really like working in the barn when it is this windy. Luckily I have project work to do inside the house.
Over the weekend, Susanna and I moved the cherry bookshelves from the workshop to the basement to be finished. I spent a couple of evenings this week sanding the carcase to prepare it for the finish. The plan is to do one coat of shellac and then spray the water-based top coat. Tonight I applied a single coat of shellac. I probably won’t be able to spray the shelves until this weekend.
I have two of the four shelves completely finished. The last two shelves will be finished after I am done with the case. There isn’t enough room in the finishing room to manage the case and shelves at the same time (yes I do need to get rid of things).
It seems in the workshop one either needs one or two clamps at a time for a project, or two shops worth of clamps for a glue-up. Never anything in-between. I’ve had to glue the face frame to the bookshelves in individual pieces because of my limited number of clamps. However, the current arrangement of the workshop makes it nearly impossible to walk all the way around the case when it is on the saw horses. So maybe it is good that I didn’t have enough clamps to attempt a big glue-up at once.
Attaching one side of the face frame to the shelves
The project overall is coming along pretty quickly. It is amazing how quick a project can be done when using sheet goods (can you say no milling of lumber).
On the down side, the top that I glued up isn’t deep enough with the face frame attached. Luckily, I have a spare piece of cherry milled and ready (hey, I do eventually learn – to mill up extra lumber) to cut and glue to the top to get it deep enough. Now if I had more clamps to do the glue-up while the face frame dries. I guess it doesn’t matter – I can’t get to the table saw with the case in it’s current location. And I don’t want to move it with the glue drying…
I was able to finish two of the shelves (build, glue edging on, one coat of shellac, and 2-3 coats of spray varnish). They turned out pretty nice. Cherry is pretty light colored right after finishing. A couple of months exposed to light and hopefully it will turn darker.
Shelves after spray finish (plus a table leaf that had been sitting in the basement for years just waiting for me to finish).
Writing in my blog – a good way to spend filling the time between the glue-up and when I can take the clamps off (and move the shelves). I think it may be time to get more clamps. Maybe a pack of 24-inch clamps from USA Clamp Company. I have 5 clamps made by them, and I love them. Plus they are way cheaper than the bar clamps purchased at most woodworking supply stores.